Showing posts with label Dessert. Show all posts

Wednesday, June 17, 2009

Rhubarb Compote with Yogurt, Oatmeal, or Lemon Curd.


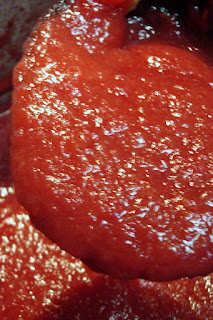
Looking for something a little different to do with your rhubarb? Well I cooked a pot full. You can call it stewed rhubarb or rhubarb compote depending on how fancy you prefer your food names. I added some to my homemade yogurt. If I had some homemade granola around (without the dried fruit), I would have added some.
I also made overnight steel cut oatmeal (without the dried fruit). I added some of the rhubarb compote and had the perfect spring breakfast for the recent rainy weather. And finally, I love the combination of lemon and rhubarb. So I made some lemon tart filling and topped it with some stewed rhubarb. A crumbled gram cracker in between the layers would have completed the dish perfectly. But sadly, there is not a gram cracker crumb in my house.
See also, my Grandma's Rhubarb Pie recipe.

Stewed Rhubarb (Rhubarb Compote)

INGREDIENTS
1 lb 5 oz chopped rhubarb (the amount my Aunt gave me from her garden)
3/8 c sugar
3/8 c water
pinch salt

Bring to a boil in a large saucepan. Cover and simmer for 10-15 minutes, stirring occasionally. I've seen recipes that add vanilla or cinnamon. Feel free to add either if you like.

Sunday, May 10, 2009

Cranberry Cornmeal Cookies (scones)


Well, I wouldn't call these cookies exactly. They are more like a cornmeal scone or something of that nature. America's Test Kitchen suggests, and I agree, that these should be served with a cup of chamomile tea or coffee. These are the kind of thing I would serve at high tea if I had any idea what high tea was or ever actually had a high tea. I do really like these, but I don't think they are the something I will crave. They are not exactly my thing, but they would definitely be someones. This recipe comes from Cook's Illustrated The Quick Recipe. The only change I made is the original recipe called for light brown sugar. I only use dark brown sugar. I like the flavor better. Hey, bonus: you don't need a mixer.

Cranberry Cornmeal Cookies
Yield 12 cookies
INGREDIENTS
1 c flour
1/2 c cornmeal
1/2 c sugar, plus 1/3 c for rolling
1/4 c dark brown sugar
1 tsp baking powder
1/2 tsp salt
1 tsp freshly grated orange zest
3/4 c dried cranberries
2 eggs
1/4 c vegetable oil

1. Adjust an oven rack to the middle position and heat the oven to 375. Line a baking sheet with parchment paper and lightly spray the parchment with nonstick cooking spray.
2. Whisk together the flour, cornmeal, 1/2 c sugar, brown sugar, baking powder, and salt in a large bowl. Add the orange zest and whisk to combine. Add the cranberries and using a rubber spatula, toss to combine. In a separate bowl, whisk together the eggs and oil. Stir in the wet ingredients into the dry ingredients until evenly moistened.
3. Fill a small bowl with cold water and place 1/3 c sugar in a 8 or 9 inch cake pan. Dip your hands into the water and roll about 2 T of cookie dough into a rough ball. Drop the ball into the cake pan with the sugar and toss to coat. Place the formed, sugar-coated cookie on the prepared pan, leaving 1 1/2 inches between balls. If your hands become sticky, dip them into the water and shake away the excess. I didn't find the water necessary. This should give you 12 cookies.
4. Bake until the cookies are light golden brown, 18-20 minutes, rotating the pan from front to back halfway through the baking time. Cool the cookies on the baking sheet until slightly set, about 2 minutes. Using a spatula, transfer the cookies to a wire cooling rack. Cool 15 minutes.

Tuesday, March 31, 2009

Brownie Cake


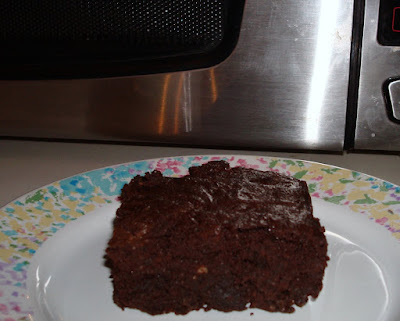
My sister (not the cake making one) made this cake for her daughter's first birthday. It is quite impressive for a person that doesn't decorate cakes or even bake much. It's not really a cake. It's actually brownies. My sister is not a huge fan of cake, but LOVES brownies. I agree. She found this recipe for a brownie cake from Taste Of Home. The cake is three layers of brownies with a chocolate ganache frosting. To decorate the cake, she colored and rolled out fondant. Then she cut the fondant with flower shaped cookie cutters and placed it on the cake. It's a good way to decorate a cake if you're a novice too.
The pros: It's a brownie cake with chocolate ganache frosting.
The cons: It's rich, so you want to cut small pieces and it's difficult to cut small pieces since it's a hard brownie with squishy chocolate ganache.
It's already on my sister's menu for next year.

Wednesday, January 28, 2009

Date-Spice Chiffon Cake


Happy Birthday Auntie Ruth. Ruth is allergic to dairy, so I knew the restaurant we went to would not have a birthday cake for her. I decided to make her a birthday cake. In the gold standard cookbook "Cooks Illustrated's The New Best Recipe" I found several chiffon cake recipes, all dairy free. I went with the date-spice version, but the orange-cranberry chiffon cake was a close runner up. Despite the admonishments to beat the whites until they are very stiff, I still don't think mine were stiff enough. All my date sank to the bottom and therefore ended up on top of the cake. My aunt said they were like frosting. They kind of were. The cake was pretty ugly, but was very moist and had good flavor. IMHO this cake is much better then an angel food cake. However, the texture is still too close to an angel food cake (which I hate) for my taste. But if chiffon cake is your thing, this is a good one, even when made by a cake making novice like me.
When my mom was 2 years old and my Aunt Ruth was 4 they snuck into the car by themselves. Ruth kept pushing the starter button (I don't know what that is either), which sent the car lurching forward six inches each time she pushed it. My mom was jumping up and down in the passenger seat yelling repeatedly "Go Ruthie!!". I agree.
Go Ruthie!!
They made it a whole block.

Date-Spice Chiffon Cake
Do not under beat the egg whites. If the egg whites are not very stiff, the cake will not rise properly, and the bottom will be heavy, dense, wet, and custard-like. Better to overbeat then underbeat. If you overbeat the egg whites and they end up dry and "blocky" you can smudge and smear the recalcitrant (whatever that means) clumps with the flat side of the spatula to break them up.

INGREDIENTS

CAKE
1 1/2 c packed (10 1/2 oz) dark brown sugar
3/4 c chopped dates
2 tsp cinnamon
1/2 tsp freshly grated nutmeg
1/4 tsp ground cloves
1 1/3 c (5 1/3 oz) plain cake flour
2 tsp baking powder
1/2 tsp salt
7 large eggs, 2 whole, 5 separated, at room temperature
3/4 c water
1/2 c vegetable oil
1 tsp vanilla extract
1/2 tsp cream of tartar

GLAZE
4 T butter, melted (or dairy free margarine)
4-5 T coffee
2 C (8 oz) sifted confectioners' sugar


1. FOR THE CAKE: Adjust the oven rack to the lower-middle position and heat the oven to 325 degrees. Process dates in a food processor until dates are reduced to 1/8-inch bits. Process all dry ingredients (up to salt on the ingredient list) until any lumps of brown sugar are pulverized. Transfer dry ingredients to a bowl and whisk in egg yolks, water, oil, and vanilla until batter is just smooth.

2. Pour the reserved egg whites into the bowl of a standing mixer; beat at low speed until foamy, about 1 minute. Add the cream of tartar, gradually increase the speed to medium-high, and beat the whites until very thick and stiff, just short of dry (as little as 7 minutes in a standing mixer and as long as 10 minutes with a handheld mixer.). With a large rubber spatula, fold the whites into the batter, smearing in any blobs of white that resists blending with the flat side of the spatula.

3. Pour the batter into an ungreased large tube (angel food) pan (9-inch diameter, 16-cup capacity). Rap the pan against the counter top 5 times to rupture any large air pockets. If using a pan with a removable bottom grasp both sides with your hands while firmly pressing down on the tube with your thumbs to keep the batter from seeping from the pan during the rapping process. Wipe off any batter that may have dripped of splashed onto the inside walls of the pan with a paper towel.

4. Bake the cake until a toothpick or thin skewer inserted in the center comes out clean, 55-65 minutes. Immediately turn the cake upside down to cool. If the pan does not have prongs around the rim for elevating the cake, invert the pan on the the neck of a bottle or funnel. Let the cake cool completely 2 to 3 hours.

5. To unmold, turn the pan upright. Run a thin knife around the pan's circumference between the cake and the pan wall, always pressing against the pan. Use a skewer to loosen the cake from the tube. For a one piece pan, bang it on the counter top several times, then invert it over a serving plate. For a two piece pan, grasp the tube and lift the cake out of the pan. If glazing the cake, use a fork or a pairing knife to gently scrape all the crust off the cake. Loosen the cake from the pan bottom with a spatula or knife, then invert onto a serving plate. (The cake can be wrapped in plastic and stored at room temperature for up to 2 days or refrigerated for up to 4 days.)

6. FOR THE GLAZE: Beat the melted butter, 4 T (1/4 c) coffee,, and the confectioners' sugar in a medium bowl until smooth. Let the glaze stand 1 minute, then try spreading a little on the cake. If the cake starts to tear, thin the glaze with up to 1 T coffee. A little at a time, spread the glaze over the cake top, letting any excess dribble down the sides. Let the cake stand until the glaze dries, about 30 minutes. If you like, spread the dribbles (before they have a chance to harden) to make a thin smooth coat. Serve.

Monday, December 8, 2008

Apple Sauce and Cranberry Ginger Applesauce


I had a ton of apples from my tree this year. So, I decided to try my hand at applesauce. First, I made the unsweetened apple sauce. This was quite good, but a bit flat for my taste. I made several batches for baby food for all the babies I know. I didn't add lemon or fruit fresh since I'm not up on the current baby feeding rules. The recipe is from this post.

In the second recipe I added a mere 1/4 c sugar and a cinnamon stick. This took the applesauce from very good to spectacular. I'm still not a huge fan of the texture of applesauce, but I really like this version. I plan to serve it with potato pancakes for breakfast over Christmas vacation.

The cinnamon ginger applesauce is good also. I cut the amount of sugar way down from the original recipe. My family is a huge fan of tart. I may cut the sugar down even more next time. 1 used 1 T ginger as called for in the original recipe. The ginger was a bit too pronounced for my personal taste, so I cut the amount in half in the recipe below. If you prefer sweeter applesauce with more ginger (as I suspect many people would) check out the original post on Pinch My Salt. If you want to get all Martha Stewart you could serve the cranberry applesauce with my sweet potato pancakes (without the spices).

***Instead of coring and cutting the apples into pieces, I used an apple/corer/slicer/peeler. The peeling part of my machine hasn't worked for years. That's not a problem since the food mill filters out the peels anyway. Once the apples are sliced, make one cut down the apples to make apple circles. If you own one of these machines, that will make sense to you. If you have an apple tree, the corer/slicer/peeler is a worthwhile investment.

Apple Sauce (unsweetened)

INGREDIENTS
10-12 lbs of apples or enough to fill a 12 quart stock pot, cored and chopped
1/2 c water
lemon juice or fruit fresh (optional to prevent browning)

Place ingredients in a stock pot. Bring to a boil. Simmer 30 minutes. Stir several times to move the top apples to the bottom. When the apples are soft, it's done. Run the contents through a food mill and discard the solids.

Cinnamon Apple Sauce
INGREDIENTS
10-12 lbs of apples or enough to fill a 10-quart stock pot
1/2 c water
1/4 c sugar
1 cinnamon stick
1 T lemon juice (or fruit fresh in an undetermined amount)

Place all ingredients in the stock pot with the cinnamon stick on the bottom. Bring to a boil. Cover and simmer 30 minutes. Stir the apples several times to move the bottom apples to the top. As it cooks, the apples will release more water. When all the apples are soft, it is done. Remove cinnamon stick and run the contents of the pot through a food mill. Discard the solids left in the food mill.


Cranberry Ginger Apple Sauce
INGREDIENTS
4-5 lbs baking apples, quartered and cored (or use the apple/corer/peeler)
1/2 c water
1 T lemon juice
1 12 oz package of cranberries
1/2 c sugar
1/2 T grated ginger
pinch of salt

Place all ingredients in a dutch oven. Bring the water to a boil. Cover the pot and simmer 30 minutes. Stir the applesauce a few times, moving the top apples to the bottom. When the apples are mushy it is done. Run everything through the food mill. Discard the peels left in the food mill.

Wednesday, November 19, 2008

German Apple Pancake (Pannakuken)

If you are from the Fargo area, you probably remember the Pannakuken Restaurant. When they brought out a pannakuken, the waitresses would run from the kitchen shouting PANNAKUKEN!!! I never made it to the restaurant, but I've seen it imitated enough to feel as if I had been there. College was divided into two camps: People who would consider being a waitress and yelling PANNAKUKEN!!! and people who would NEVER consider working there. The debate was ongoing. I was part of the "would consider it" camp, and my roommate belongs to the "would never consider it" camp.

A few notes on the recipe:

The first time I made this recipe I liked it more then the second time I made it. I'd suggest making apple crisp instead. It's a better apple recipe. Pannakuken is very sweet. The recipe says it serves four, but I'd suggest serving 6-8 people. I'd also suggest serving it as the dessert part of your breakfast or as actual dessert. The pannakuken took longer to cook in my oven then the recipe states. That may just be my oven however. I didn't peel the apples. I have an apple tree and was over the idea of peeling by the time I made this recipe. Oops, my camera ran out of batteries before I took a picture with the powdered sugar sprinkled on the top. This recipe came from "Cooks Illustrated The New Best Recipe".


GERMAN APPLE PANCAKE (PANNAKUKEN)

A 10-inch ovenproof skillet is necessary for this recipe; we highly recommend using a nonstick skillet for the sake of easy cleanup, but a regular skillet will work as well. You can also use a cast-iron pan; if you do, set the oven temperature to 425 degrees in step 1, and when cooking the apples in step 3, cook them only until just barely golden, about 6 minutes. Cast iron retains heat better than stainless steel, making the higher oven temperature unnecessary. If you prefer tart apples, use Granny Smiths; if you prefer sweet ones, use Braeburns. For serving, dust the apple pancake with confectioners' sugar and pass warm maple syrup or caramel sauce separately, if desired.

INGREDIENTS

1/2 c flour

1 T sugar

1/2 tsp table salt

2 eggs

2/3 c half and half

1 tsp vanilla extract

1 T Butter

1 1/4 lb granny smith or baeburn apples (3 to 4 large apples), peeled, quartered, cored, and cut into 1/2 inch thick slices

1/4 c brown sugar

1/4 tsp cinnamon

1 tsp lemon juice

confectioners sugar for dusting


1. Adjust oven rack to upper-middle position; heat oven to 500 degrees.


2. Whisk to combine flour, granulated sugar, and salt in medium bowl. In second medium bowl, whisk eggs half-and-half, and vanilla until combined. Add liquid ingredients to dry and whisk until no lumps remains, about 20 seconds; set batter aside.


3. Heat butter in 10-inch ovenproof nonstick skillet over medium-high heat until sizzling. Add apples, brown sugar and cinnamon; cook, stirring frequently with a heatproof rubber spatula, until apples are golden brown, about 10 minutes. Off heat, stir in lemon juice.

4. Working quickly, pour batter around the outside edge of the pan

and then over the apples. Place skillet in oven and immediately reduce oven temperature to 425 degrees; bake until pancake edges are brown and puffy and have risen above edges of skillet, about 18 minutes. Mine took much longer, but I think my oven temperature is a bit off.

5. Shout Pannakuken at the top of your lungs while running through the house.


6. Using oven mitts to protect hands, remove hot skillet from oven and loosen pancake edges with a heatproof spatula; invert pancake onto serving platter. Dust with confectioners' sugar, cut into wedges and serve.

Wednesday, November 5, 2008

Cream Cheese Mints


When I was growing up wedding menus were all the same. The church ladies (women who attended the church) made all the food. You could choose between a ham or a turkey sandwich on a white bun with cheese and mayo. At the end of the buffet line were these wonderful cream cheese mints. They were always green leaf shapes and pink and white flower shapes. At every wedding I would wait until all the people had gone through the food line. When it was polite (loosely speaking) I would gorge myself on whatever cream cheese mints were still sitting out.

I helped make the mints for a friend of the family's wedding about ten years ago. Man they were a lot of work. My sister (the cake maker) is visiting now and made the mints with her three year old daughter. Turns out they are only a lot of work if you make a thousand mints. A small batch is quick and easy. Sadly, if I was making these I'd just sit down with the batter and a big spoon. But if you're less of a piggy then me (snort), this is a good recipe to make with kids. The dough is play-doughish and fun for kids to make into shapes. The mints can be colored with food coloring if you like.

Cream Cheese Mints
INGREDIENTS
2 oz cream cheese
2 tsp butter
2 c powdered sugar
1/3 tsp peppermint extract
food coloring (optional)

Combine the ingredients. You can do it by hand with a recipe this size or you can use a mixer. Knead the "dough" a bit to make sure the ingredients are evenly distributed. Shape. We did this by hand in our house like you would with play dough. You can also use molds of leaves and flowers. Dry 2 hrs at room temperature. This is the hardest step for a preschooler. Refrigerate.

Monday, July 21, 2008

Lemon Tart Parfait


I've given up on pie crust. I think even really good pie crust is only kind of good. To me, it's just not worth the calories. And, my pie crusts are terrible. I also don't quite get meringue. It's just not for me. I do like the lemon part of the pie however. My Aunt went to visit her cousin in California. She brought me back this lemon from her cousin's (or maybe her cousin's daughter's) tree. It's was huge. I thought it deserved a bit more reverence the just being squeezed into iced tea. So, I made half a recipe of lemon curd and made that into parfaits. I didn't strain out the zest, as called for in the recipe. It's still fine, but you might want to. People with texture issues will want it strained out. This recipe is adapted from "Cooks Illustrated The New Best Recipe". My sister gave it to me for my birthday. She refers to that cookbook as "the dictionary". It's 1,026 pages.


Lemon Tart Parfait

INGREDIENTS
7 large egg yolks
2 large eggs
1 C plus 2 T sugar
2/3 C lemon juice (from 4-5 lemons)
1/4 C lemon zest
pinch salt
4 T butter, cut into 4 pieces
3 T heavy cream

gram crackers
berries
In a medium non reactive bowl, whisk together the yolks and whole eggs until combined, about 5 seconds. Add the sugar and whisk until just combined, about 5 seconds. Add the lemon juice,zest and salt. Whisk until combined, about 5 seconds. Transfer the mixture to a nonreactive saucepan, and add the butter pieces, and cook over medium-low heat, stirring constantly with a wooden spoon (or a silicon spatula or a silicone whisk), until the curd thickens to a sauce like consistency and registers 170 degrees on an instant read thermometer, about 5 minutes. Immediately pour the curd through a fine-mesh stainless steel strainer (to remove the zest) set over a clean non reactive bowl. Stir in the heavy cream. Cool in the refrigerator. To serve: layer the lemon curd, berries, and gram cracker crumbles in a martini glass.

Monday, June 16, 2008

Chocolate Chip Cookie Topped Brownie Bars


I found this recipe while poking around the Internet and e-mailed it to my sister Julie. They seemed right up her alley. Brownies with chocolate chip cookies on top. Those are two of the only deserts that are acceptable to Julie. It's not that she doesn't like other desserts. It's just that she doesn't really see the point of making non chocolate desserts. I told her I made the one smart cookies (next post) and she asked what was in them. I told her and inadvertently forgot to list chocolate chips. She says that she hates cookies with random (cardamom and nutmeg) spices. "What's the point of making cookies that aren't chocolate chip? Why didn't you put chocolate chips in them?", she joked. I told her there were chocolate chips in them and her tone changed. She said, "When you come for my daughter's baptism, you should bring some of them along."


We made these chocolate chip brownie bars for Lillian's baptism. Three notes on them. First, they are a fair amount of work. You are making brownie batter and chocolate chip cookie dough all at once. (I found the recipe to be less of a hassle then Julie, but I'm guessing more people would agree with her.) Second, they make enough for an army. The bars get to be approximately two inches deep so if you cut them an in an a 1 1/2 inch square, you have a good sized bar. One pan makes a ton of bars. Third, our bars didn't come out pretty like the ones Eggs on Sunday made in the first link. They didn't have distinct layers. Our cookie layer got very dark. You wouldn't know the cookie layer was there unless you knew to look for it. Julie's oven temperature is a little off, so that may be the problem. We ended up having to cook these longer then the recipe called for. In another oven you may or may not get the pretty version. Now for the important part, the taste is exactly what you would imagine. Chocolate heaven. What else would you expect from a somewhat cakey brownie topped with a chocolate chip cookie. I've added a picture to this post of the pretty cookies Julie's friend Beata made for the baptism. The original chocolate chip/brownie recipe came from this cookbook.

CHOCOLATE CHIP COOKIE TOPPED BROWNIE BARS

INGREDIENTS

For the brownie layer
6 ounces bittersweet chocolate, coarsely chopped
3 ounces unsweetened chocolate, coarsely chopped
2 sticks (8 ounces) unsalted butter, cut into chunks
1 2/3 cups sugar
4 large eggs
1/2 teaspoon salt
1/2 teaspoon vanilla extract
1 cup all-purpose flour
1 cup walnuts, coarsely chopped (I omitted)

For the cookie layer
1 1/4 cups all-purpose flour
1/2 teaspoon baking soda
1/2 teaspoon salt
1 1/2 sticks (12 tbsp) unsalted butter, at room temperature
3/4 cups (packed) light brown sugar
2/3 cup sugar
1 large egg
1 large egg yolk
1 teaspoon pure vanilla extract
6 ounces bittersweet chocolate, chopped into chips, or 1 cup chocolate chips

Directions

Preheat the oven to 350 degrees F. Line a 9x13 inch baking pan with aluminum foil or parchment (use enough so that it comes up and over the sides), and butter the foil/parchment.

To make the brownie batter, melt both chocolates and the butter together in a bowl set over a saucepan of simmering water, stirring occasionally. Melt and stir just until the mixture is shiny and smooth, then remove the bowl from the heat and set aside.

Meanwhile, beat the sugar and eggs together in the bowl of a stand mixer fitted with the paddle attachment (or using a hand mixer) on medium high speed for about 2 minutes, until pale, thick and creamy. Beat in the salt and vanilla, then reduce the speed to low and mix in the melted chocolate and butter, mixing just until incorporated. Scrape down the sides of the bowl and then add the flour, mixing on low speed just until it disappears into the batter. Turn off the mixer and fold in the chopped walnuts by hand with a spatula, then scrape the batter out into the prepared pan and smooth the top with a spatula. Set aside.

To make the cookie dough, first whisk together the flour, baking soda and salt in a small bowl, and set aside. Wash the bowl of your stand mixer (that you used to make the brownie batter), and then beat the butter and both sugars together using the paddle attachment on medium-high speed until smooth and creamy, about 3 minutes. One at a time, add the egg and the egg yolk, beating for 1 minute after each addition. Beat in the vanilla, then reduce the speed to low and add the dry ingredients, mixing only until they disappear into the batter. Still on low, mix in the chopped chocolate or chocolate chips.


Drop the cookie dough by spoonfuls onto the brownie batter, then use a spatula to gently smooth out the cookie dough layer evenly over the batter.

Bake for 50-55 minutes, until the cookie top is deep golden brown and a sharp knife inserted into the pan comes out with only faint streaks of moist chocolate.


Transfer the pan to a cooling rack to cool, then when you're ready to cut them, just lift them out using the foil/parchment that you lined the pan with. It's easiest to cut these when they're cool/cold, if you can wait that long.

Monday, June 9, 2008

One Smart Cookie


I found this recipe on Rhubarb and Venison. Beth from Rhubarb and Venison found it on Everyone Likes Sandwiches. It's a healthy cookie with whole wheat and oats. But the question everyone wants to know is "What do they taste like?". Well, they taste like a cookie. A healthy cookie, but definitely a cookie. They will definitely satisfy you sweet tooth. In fact I may consider cutting the brown sugar next time. But then again, cookies should be sweet or what's the point. With all the oats they are a bit like a granola bar as well. I made a few substitutions, mostly because of what I had on hand. I used half maple syrup and half honey (because I ran out of maple syrup), I used half pecans and half walnuts (because I ran out of walnuts), wheat bran instead of oat bran (because I keep wheat bran on had to make granola), mini chips (I keep those around in case I need to make mint chip ice cream) and I ground the flax seeds. If you don't grind flax seeds your body cant digest them properly and the good nutrition just passes through your body. Oh, and I used parchment paper to bake them on in place of a silpat. Beth from Rhubarb and Venison described the dough as a little fussy. I'd describe it as a giant pain in the butt. It's sticky and doesn't want to stick to itself. (This may be due to my substitutions.) Oiling your hands helps some, but they are still a pain. I just kind of shaped most of my cookies in a pressed together clump rather then rolling and flattening. There is no oil or butter in these cookies, so they won't spread. They will end up pretty much the shape that they were when they went in the oven. Oh, these are vegan too if make sure there is no dairy in your chocolate.

ONE SMART COOKIE
Yield 65 cookies

INGREDIENTS
1 c whole wheat flour
1 1/2 c rolled oats
1/2 c oat bran ( I used wheat bran)
1 c raisins
1/2 c coconut
3/4 c semi-sweet chocolate chips
1/2 c walnuts, broken
1/2 c sesame seeds
1/4 c flax seeds, ground
1/2 t baking soda
1 t cinnamon
1 large pinch each nutmeg + cardamom
1 t vanilla
1/2 c applesauce
1/2 c maple syrup
1/2 c brown sugar

Preheat oven to 350 degrees. In a large bowl mix up everything from the flour on down to the nutmeg/cardamom. In a separate bowl, combine the remaining ingredients. Add the dry to the wet and mix well.
Roll a tablespoon of the mixture into your hand and then flatten. Place on a silpat covered cookie sheet and bake for 14 (16 for me) minutes or until the tops feel dry. Let rest on cookie sheet for 3 minutes and then transfer to a wire rack to cool. Store in a covered tin.

Thursday, February 28, 2008

Key Lime Cheesecake

This is a super easy and a nice summer treat. Buy a gram cracker crust. Mix three ingredients in a mixer. Pour into crust and chill. You can make the whipped cream topping if you feel like it. It's only slightly more complicated, but it's fine if you just stop with the key lime filling. One thing to note is that Key Lime Juice is not lime juice. Key lime is sweeter. Don't bother looking for fresh key limes. (a lemon, a lime and a key lime in link) I doubt they sell them in very many places. Garnish with strawberries.

Key Lime Cheesecake

INGREDIENTS

For filling:

An 8-ounce package cream cheese, softened (low fat & fat free work well)

A 14-ounce can sweetened condensed milk (low fat works here also)

1/2 cup fresh or bottled Key lime juice

1 teaspoon vanilla

For the whipped cream topping:

1 cup well-chilled heavy cream

1 tablespoon sugar

1 teaspoon vanilla-I just use a drop in the cream

Make filling

In a bowl with an electric mixer beat together filling ingredients until smooth and pour into a prepared gram cracker crust. Chill cheesecake at least 1 hour or up to overnight.

For the whipped cream topping:

In another bowl with cleaned beaters beat cream with sugar and vanilla until it holds soft peaks and spread evenly on cheesecake. TIP: If you make the whip cream ahead of time and place it in the refrigerator in a coffee filter lined sieve, the whip cream will not collapse. See my video. It will hold for at least a day and a half, probably more. The most I ever tried is a day and a half.

Also, it's good without the whipped cream.

Monday, February 4, 2008

Microwave Brownies


This is a scary recipe, because you can have brownies in about 25 minutes from now. That's scary knowledge for me to know I can almost instantly have brownies at any time. These aren't the worlds best brownies, but they are very good and did I mention you can have them in about 25 minutes. I suggest serving them with ice cream and Edna's chocolate sauce, which you can make while the brownies are in the microwave. I usually make the frosted version of these brownies. This recipe is from America's Test Kitchen.


MICROWAVE BROWNIES


For mocha brownies, a 1T instant espresso powder to the batter. For nut brownies, add ½ c toasted, chopped walnuts to the batter along with the other dry ingredients. The cookbook claims you must eat these brownies warm because the turn rock hard after they cool. I haven’t found that to be true. I like them better cool.


INGREDIENTS

3 large eggs

1 ½ c (10 ½ oz) sugar

8 T (1 stick) unsalted butter, melted (in microwave)

3/4 c (3 3/4 oz) unbleached all-purpose flour

1 c (4 oz) cocoa powder

1/8 tsp salt

1 tsp vanilla extract

½ c semisweet chocolate morsels


1. Spray an 8 by 8-inch microwave safe baking dish with nonstick cooking spray.


2. Whisk together the eggs and sugar in a medium bowl. Slowly whisk in the melted and cooled butter. Stir in the flour, cocoa powder, and salt. Stir in the vanilla and chocolate morsels. With a spatula, scrape the batter into the prepared pan.


3. Microwave on high until a toothpick or skewer inserted into the center comes out clean, 5 to 7 minutes. You can tell the brownies need more time if, when the pan is tilted, the brownies slouch to the lower side. Cool the brownies for 10 minutes, cut into squares, and serve warm.


Note: On a episode of America's Test Kitchen they said for chewy brownies to use 70% unsaturated fat and 30% saturated fat. So maybe next time use oil and butter.

FROSTED MICROWAVE BROWNIES


Follow the recipe for Microwave Brownies, microwaving them for only 4 minutes. Remove the pan from the microwave and evenly sprinkle ½ c semisweet chocolate morsels over the top of the brownies. Return the pan to the microwave and cook for an addition 1 to 3 minutes (or until a toothpick or skewer inserted into the center comes out clean). Remove the pan from the microwave and, using the back of a spoon, spread the softened chocolate morsels (they will not melt in the microwave) over the top of the brownies. Cool and cut into squares as directed.

Sunday, February 3, 2008

Eva's Pistachio Dessert

Mmmmm....For years, this was my middle of the summer birthday cake made by my Grandma Eva. My favorite since childhood. When I make this again, I'll probably substitute real whipped cream for the chemical concoction of cool whip. I'd suggest placing your whipped cream in a coffee filter lined strainer that is put over a bowl. Place saran wrap over the top and place it in the fridge for a few hours. This causes some of the excess moisture (whey) to be drained out. The whipped cream is now more stable and won't collapse as easily. If that makes no sense, see my video. You can (and should) double this recipe and use an 8 x 12 inch (or whatever the actual size of those cake pans are) cake pan.

EVA ANDERSON'S PISTACHIO DESSERT


INGREDIENTS

1 cup flour

1/2 cup butter

1/2 cup pecans


8 oz cream cheese

1 cup powdered sugar

9 oz container cool whip


1 package pistachio pudding

1 package coconut cream pudding


Cut together the flour, butter and pecans. Press into the bottom of a square cake pan. Bake 15 minutes at 350. Cool.

With a mixer, cream cream cheese with powdered sugar. Fold in half of the cool whip. Spread over the cooled crumb mixture.

Spread prepared pistachio pudding over cream mixture, followed by prepared coconut pudding. Spread rest of cool whip over these layers. Sprinkle with toasted coconut. (Toast coconut in the oven) Store in the refrigerator.


Wednesday, January 30, 2008

Edna's Chocolate Sauce

This is another of my Grandma Owens's recipes. I've had other people tell me that I seem to be missing some ingredients, although they couldn't remember what the ingredients were exactly. If anyone knows, let me know. The recipe works fine as written here. This chocolate sauce is something you can just whip up when you want a fun family snack. It gets almost a chewy consistency when poured over ice cream. The ice cream will melt quickly, so be ready to eat. It has a similar taste to Grandma Eva Anderson's chocolate icing. (to be blogged later) So, those of you who know that recipe might like to try this quicker option over ice cream. I don't think this sauce would keep very well. However, I don't really know because my Mom won't permit any chocolate sauce leftovers.

EDNA'S CHOCOLATE SAUCE

INGREDIENTS

1 cup sugar

1 T flour

1 T cocoa powder

Dash salt

1/4 c milk (or enough to just make a liquid)


Combine all ingredients in a sauce pan. Heat in sauce pan over a medium heat until it comes to a rolling boil. Cool the sauce somewhat. Pour over ice cream.

Caramel Sauce

I recommend making butterscotch sauce instead. It's easier to make and you are less likely to have a bad result. If you are going to make this, it takes a long time. If you've been cooking this for a s while and it doesn't look like carmel, don't stick your finger in it to taste it to see if it tastes like carmel. If you do stick your finger in it, don't stick your finger in your mouth to cool the burning. Stir in the sugar very slowly. Be patient. You don't want sugar clumps or a grainy sauce. If you end up with clumps anyway, you can strain them out before you serve it. For the science of candy making click here. Let carmel get as dark as you can without letting it burn. Dark carmel has more developed flavors. With all the cautions, homemade carmel is much better then store bought. It has the flavors of homemade carmel candies that people make at Christmas time. This recipe comes via Epicurious.

CARAMEL SAUCE


INGREDIENTS


7 T light corn syrup

2 1/2 cups superfine granulated sugar

1 cup plus 1 T heavy cream

1 T unsalted butter, if making the sauce in advance


In a large heavy sauce pan heat the corn syrup over moderately high heat until it is hot, but do not let it boil. Stir in the sugar, a little at a time, stirring until the mixture is combined well with each addition. Cook the mixture until it is golden, and remove the sauce pan from the heat. Stir in the cream carefully, a little at a time, stirring until the sauce is combined well. Stir in butter.

hot fudge sauce

This recipe is from Epicurious.

OLD FASHIONED HOT FUDGE SAUCE


INGREDIENTS

2 oz unsweetened chocolate, chopped fine

2 T unsalted butter

2 T light corn syrup

3/4 heavy cream

1 cup sugar

2 tsp vanilla

1/8 tsp salt


In a heavy saucepan melt the chocolate with the butter and the corn syrup over moderately low heat, stirring, add the cream and the sugar, and cook the mixture, stirring, until the sugar, is dissolved. Bring the mixture to a boil over moderate heat and boil it, without stirring for 8 minutes. Remove the pan from the heat and stir in the vanilla and salt. Serve the sauce hot over ice cream. The sauce keeps, covered and chilled for 1 month. (Let the sauce cool completely before covering it; any condensation will make it grainy. Reheat the sauce, uncovered, in a double boiler.) Makes about 1 1/3 cups.

Peanut butter sauce

This along with hot fudge with make the best ice cream peanut buster parfait ever. This recipe comes from Epicurious.

PEANUT BUTTER SAUCE


INGREDIENTS

1/4 cup brown sugar

2 T corn syrup

2 T unsalted butter

1/2 cup smooth peanut butter

1/2 cup cream

1 1/2 tsp vanilla


In a small heavy saucepan combine the brown sugar, the corn syrup, and the butter and bring the mixture to a boil, stirring until the sugar is dissolves. Add the peanut butter, whisking and whisk the mixture until it is smooth. Whisk in the cream and the vanilla, simmer the sauce for 2 minutes, and thin it to the desired consistency with hot water. Serve the sauce warm. The sauce keeps chilled for 2 months. Makes about 1 1/2 cups.

Butterscotch sauce


I recommend making butterscotch instead of caramel. Carmel can easily become grainy and clumpy and it takes much longer to make. In my opinion, butterscotch is better then caramel anyway. I've loved butterscotch since I was a kid. When I made this last it reached 280 degrees in 7 minutes with the burner set on 5. Next time I should turn the stove down to 3. This recipe comes from Epicurious.

BUTTERSCOTCH SAUCE


INGREDIENTS

1 cup brown sugar

1/4 cup corn syrup

1/4 cup butter

pinch salt

1/2 cup heavy cream

1 1/2 tsp vanilla

1/4 tsp lemon juice

1/2 cup coarsely chopped pecan, toasted (optional)


In a medium heavy saucepan, combine the brown sugar, the corn syrup, the butter, and a pinch of salt, cook the mixture over moderate heat, stirring and washing down any sugar crystals clinging to the side with a brush dipped in cold water, until the sugar is dissolved, and boil it, undisturbed for 12 minutes, or until a candy thermometer registers 280. Remove the pan from the heat and very slowly and carefully stir in the cream. It bubbles up a lot. So, add the first drops of cream carefully. Then, stir in the vanilla, the lemon juice, and the optional pecans. Serve the sauce warm or at room temperature. The sauce keeps, chilled, for 2 months. Makes about 1 1/3 cups.

Edna's Rhubarb Custard Pie


I got this recipe from Stacia who told me it had been my Grandma Edna's recipe. When Kristy made this pie (and took the picture) recently, there was indeed too much pie filling as I had suspected. Kristy and I think you should make the recipe for the 8-inch pie filling for a 9-inch pie. Kristy thinks that they may have changed the size of the pie plates to make them shallower in recent years.


Edna's Rhubarb Custard Pie

INGREDIENTS (8-inch pie)

1 8-inch pie shell + pie dough for lattice crust (optional)

1 1/2 c sugar

3 eggs

2 T flour

1/2 c cream

3 c rhubarb


INGREDIENTS (9-inch pie)

1 9-inch pie shell + pie dough for lattice crust (optional)

2 c sugar

4 eggs

2 T flour

2/3 c cream

4 c rhubarb


Mix all the ingredients and pour into pie shell. Make a lattice top. Bake 1 hour at 350.

Friday, January 11, 2008

Ginger berry sauce

You can serve this sauce over waffles with whipped cream or yogurt, over ice cream, in plain yogurt, on pancakes, with oatmeal, or over angel food cake. It would also be good over grilled peaches. One recipe doesn’t make very much, so you may want to double this. This recipe comes from Everyday Foods.


GINGER BERRY COMPOTE


INGREDIENTS

1 bag (1 lb) frozen mixed berries

2-3 T sugar

1 tsp grated lemon zest

1 tsp minced fresh ginger


1. In a medium saucepan, combine ingredients. Cook, stirring occasionally, over medium heat, until berries have softened and released their juices, 10 to 12 minutes. Let cool slightly. Can serve warm or cold.

1/8 of syrup with a slice of cake 1/8 of the angel food cake. 159 calories, 0.4 g fat.